


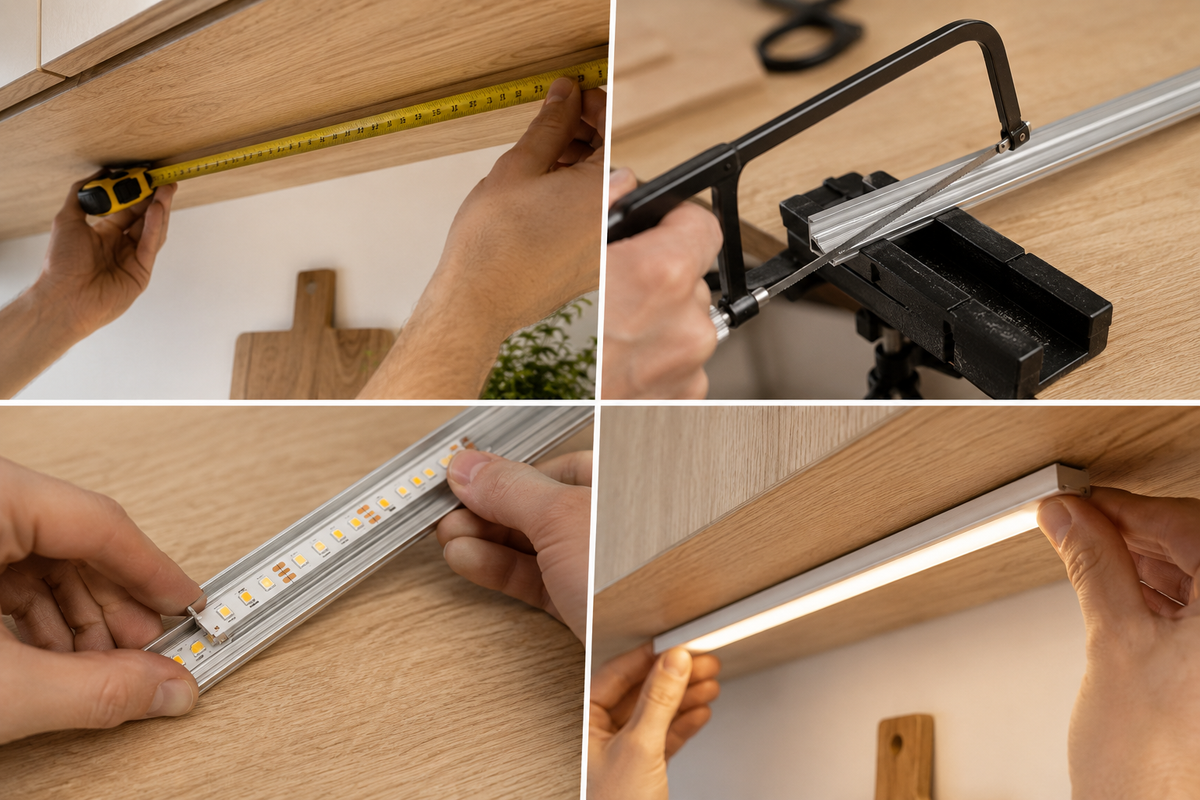
Professional LED lighting installation almost invariably requires a frame structure cut to the correct size. A quality aluminium profile protects LED strips mechanically from dust and moisture, whilst also serving as an essential heat sink. Profiles are usually supplied in standard-length bars, so cutting them to exact measurements is a mandatory step for kitchen backsplashes, ceiling recesses and stairways.
Working with soft metal requires precision. Using the wrong tools or cutting hastily can cause the profile edges to bend, the coating to scratch and sharp burrs to remain on the cut surface. A neat cut and the correct fixing method ensure that the diffuser and end caps fit securely in place. This guide covers the key steps in measuring, cutting and fixing profiles.
Tools Required for Cutting Aluminium Profiles
A successful cut begins with the right blade choice. Aluminium is a soft and tenacious metal that readily sticks to blades with too few teeth. Incorrect tooth spacing can tear the aluminium and bend the profile's thin walls.
Depending on the tools available, you can cut profiles neatly using the following:
- Chop saw and mitre saw with fine-toothed aluminium blade: The most effective way to achieve a perfectly straight and burr-free cut. The blade teeth should be closely spaced (preferably with a negative rake angle), so the blade doesn't bite into the metal. The correct blade type removes aluminium swarf efficiently, preventing soft metal from welding to the blade.
- Fine-toothed hacksaw: A reliable hand tool for individual cuts. Choose a blade with at least 24–32 teeth per inch, so the cut progresses smoothly without tearing the profile.
- Fine-grade metal file or sandpaper: Required for finishing the cut surface and removing small burrs after sawing.
- Masking tape and sharp pencil: Protects the aluminium's anodised surface from scratches and helps mark an accurate cutting line.
- Protective equipment: When cutting with a power saw, fine aluminium swarf flies about. Safety glasses are essential to protect your eyes.
When working with appropriate tools, quality LED profiles and strips retain their shape and neat appearance without edge distortion.
How to Measure and Cut a Profile Without Leaving Burrs
Accurate measuring ensures the profile fits its allocated space without visible gaps. When measuring, account for the thickness of the end caps: caps typically add around 2–4 millimetres to the overall length per covered end.
A smooth cut can be achieved using the following method:
- Protect the surface with tape: Wrap a layer of masking tape around the measurement point. The tape protects the aluminium coating from scratches caused by the saw guide and prevents edge chipping.
- Mark the line with a square: Draw the cutting line on the tape with a sharp pencil and verify the right angle with a square.
- Saw with steady feed: When sawing by hand, begin with a gentle pulling motion so the blade finds its track. When using a chop saw, allow the blade to reach full speed before touching the aluminium. Guide the blade through the metal steadily without excessive pressure.
- File the edges clean: After cutting, sharp burrs almost invariably remain on the edge. Clean the cut surface by filing it lightly with a fine-grade metal file from the outer edge inwards.
With a sharp blade and calm sawing motion, you can avoid sharp burrs forming on the aluminium edge. Clean filed edges prevent damage to the LED strip's adhesive backing and ensure end caps fit tightly in place.
Fixing Methods: Screws, Clips or Double-Sided Tape
The correct fixing method depends on the mounting surface and how easily you want to remove the profile later for maintenance.
Direct screw fixing:
Screwing through the profile base gives the strongest mechanical grip. Use countersunk screws and countersink the screw holes in the aluminium. If the screw heads remain proud of the profile's internal surface, the LED strip won't adhere evenly to the base. This weakens heat transfer from the strip to the profile and can shorten the LED strip's lifespan.
Fixing clips:
Separate mounting brackets are screwed to the substrate, after which the finished aluminium profile is clicked into place. Fixing clips allow the profile to be removed later without damaging surfaces with screwing. Additionally, screw heads remain completely hidden behind the profile.
Double-sided mounting tape:
Quality foam tape suits smooth surfaces such as glass or metal where drilling is impossible. The tape must withstand temperature fluctuations, as the aluminium profile warms steadily when the lights are on.
If needed, explore how surface-mounted LED profiles fit different substrates and which brackets suit your installation.
Valotehdas Installation Solutions
Find suitable surface-mounted profiles and mounting brackets for quality installation from our comprehensive range.
Explore profiles and bracketsInstalling the Diffuser and End Caps to Finish the Profile
Installing the plastic diffuser and end caps completes the luminaire and protects the internal LED strip from dust. The diffuser softens the light and prevents individual light points from showing, making the lighting pleasant to the eye.
Care must be taken when cutting the diffuser, as thin plastic cracks more readily than metal. Proceed as follows:
- Cut the diffuser using the correct technique: The cover should be cut whilst clicked into the profile or separately using a fine-toothed hacksaw. When the plastic cover is sawn inside the aluminium profile, the aluminium supports the plastic and thus prevents edge cracking during cutting.
- Allow for thermal expansion: Acrylic and polycarbonate expand when heated at different rates to aluminium. Leave the plastic cover around 1 millimetre shorter than the aluminium body. This small clearance prevents the diffuser from warping or snapping out of place when the luminaire warms during extended use.
- Install end caps and consider cabling: End caps are pressed or screwed into the profile ends. Before cutting, note which end the supply cable will enter, and use an end cap with a cable hole on the feed side.
Common Installation Mistakes and How to Avoid Them
Small oversights during preparation can result in LED strips detaching or the luminaire failing prematurely. Check these points before final fixing:
1. Inadequate base cleaning:
Fine metal dust and grease remain on the aluminium profile's internal surface from cutting and manufacturing. If the strip is stuck to uncleaned aluminium, the adhesive tape loses its grip over time. Wipe the profile's internal base carefully with isopropanol or a degreasing cleaner before adhering the LED strip. A clean surface ensures the strip stays firmly attached to the profile, allowing heat to transfer efficiently away from the strip's components.
2. Forgetting cable entry holes:
If a supply cable hole isn't drilled in the end cap or profile base before adhering the LED strip, the cable can become trapped between the aluminium and wall. This can damage the cable's insulation and cause a short circuit.
3. Pressing the strip with sharp tools:
When pressing LED strip to the profile base, use fingers or a soft cloth. Sharp tools such as screwdriver tips can damage the strip's components and conductors, causing individual LEDs to fail.
Neat cutting and correct installation of aluminium profiles require only a little patience and the right tools. When you observe accurate measurements, clean the aluminium surface before bonding and leave the diffuser a small amount of living room, the result is an unobtrusive, durable and functional lighting solution for your home.


0 comments